

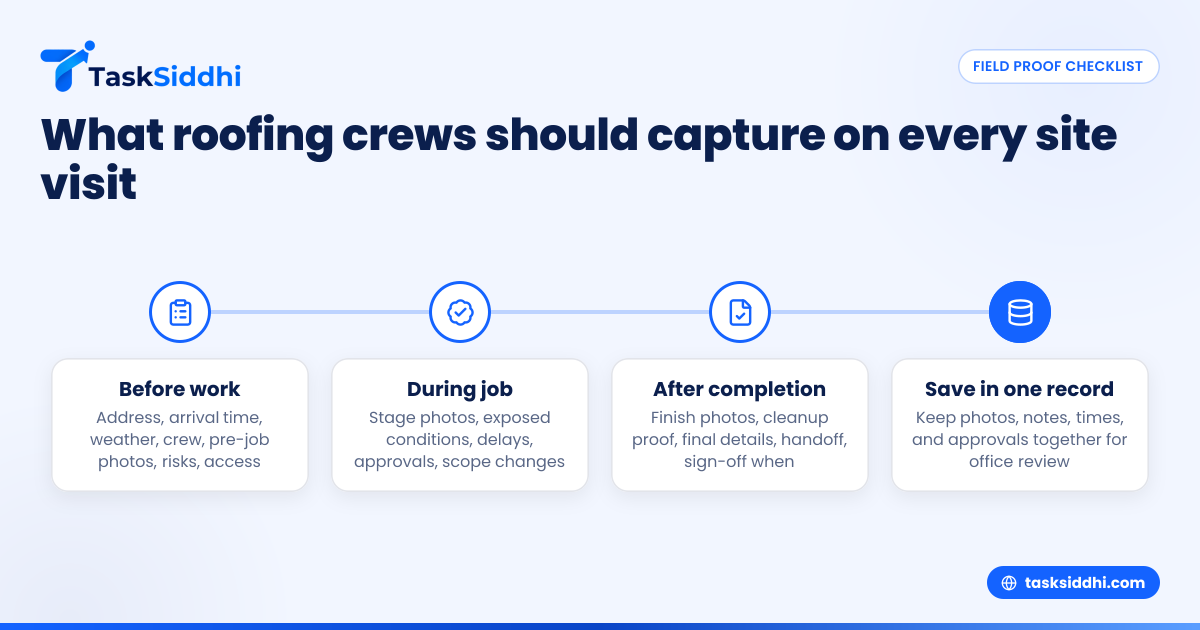
A site visit proof checklist for roofing contractors is a standard way to document what you saw, what work was done, and what condition the property was left in. In the United States, good proof protects your crew from disputes, helps office staff bill faster, and gives homeowners, insurance adjusters, and commercial clients a clear record.
Key takeaways
- A strong checklist covers pre-job condition, on-site progress, and post-job completion.
- Photos alone are not enough. You also need timestamps, notes, crew details, and customer sign-off when appropriate.
- Roofing proof should be consistent across every job, from a small repair in Detroit to a full replacement in Houston.
- The best checklist is short enough for crews to use in the field and detailed enough for the office to trust.
- Mobile documentation reduces missed details, lost paper forms, and back-and-forth phone calls.
- A shared system for job cards, proof, and updates is easier to manage than WhatsApp threads and paper folders.
Why site visit proof matters for roofing contractors in the United States
Roofing jobs create disputes easily. A customer may say damage existed after your crew arrived. A property manager may question whether a technician visited the site at all. An insurance-related job may need better documentation before payment moves forward.
That is why a site visit proof checklist for roofing contractors should be part of every job, not just large or difficult ones. The goal is simple. You want a repeatable record that shows the property condition, the work completed, and the evidence behind your invoice.
In the United States, roofing businesses often deal with a mix of homeowners, HOAs, property managers, general contractors, and commercial building owners. Each expects fast updates. Each may ask for photos, arrival times, and proof of completion. If your crew stores that information in texts, camera rolls, and handwritten notes, things get missed.
A clear field process helps in four ways:
- It reduces disputes about damage, delays, and incomplete work.
- It helps the office send invoices faster.
- It supports warranty and callback handling.
- It creates a record your team can find later.
If your jobs involve inspections, repairs, emergency tarping, maintenance, or full roof replacements, the checklist should fit all of them. The format can change by job size, but the core proof should stay consistent.
What should a roofing crew capture before starting work?
Capture the property address, arrival time, weather, crew members on site, and clear pre-job photos of roof areas, access points, landscaping, siding, gutters, and any existing damage. Add notes on materials delivered, safety issues, and anything the customer said before work began.
Before a single shingle is removed, your crew should create a baseline record. This matters because many arguments start with one question: what was the condition before your team touched anything?
Pre-job proof checklist
Use this checklist at arrival:
- Job number or work order number
- Full property address
- Customer name and contact
- Crew lead name
- Names of workers on site
- Arrival date and time
- Weather conditions
- Type of job: inspection, repair, replacement, emergency service, maintenance
- Scope expected for the day
- Safety risks observed
- Access issues, such as locked gates or steep access
- Materials present on site
- Equipment brought to site
Pre-job photos to collect
Photos should be clear, wide first, then close-up. A useful sequence is:
- Front of the property
- Street view showing the location
- Driveway and access path
- Landscaping near work zones
- Siding and exterior walls near ladder setup
- Gutters and downspouts
- Roof planes from ground level
- Close-ups of visible damage
- Existing interior leak areas if the customer allows access
- Any fragile items near debris zones
This protects your business if there is later confusion about dents, broken plants, siding marks, or pre-existing roof damage.
Pre-job notes that crews often forget
Photos help, but short written notes often save the day. Train crews to document:
- Customer concerns in their own words
- Areas the customer asked you to avoid
- Visible storm damage already present
- Existing soft spots or structural concerns
- Power lines, skylights, solar equipment, satellite dishes, or HVAC units
- Neighbor proximity when debris or access could affect others
For many roofing companies, this is where paper systems break down. Crew members rush. Notes get skipped. Pictures stay on one person’s phone. Using a shared workflow with a mobile app can make that proof easier to capture and easier for the office to review the same day.
What should be documented during a roofing job?
Document progress at each major stage, including tear-off, decking condition, underlayment, flashing, repairs, material installation, and any change in scope. Record exceptions, weather delays, added approvals, and photos that show work quality, not just the finished roof.
During-job proof matters because it explains how the result was achieved. If all you have is a before photo and an after photo, you are missing the middle. That is often where cost changes, hidden damage, and quality questions appear.
During-job proof checklist
At each major stage, collect:
- Time work began
- Stage reached
- Photos of work in progress
- Areas opened up
- Decking condition once exposed
- Rotten wood or structural issues found
- Flashing condition
- Underlayment installation
- Ice and water shield areas where applicable
- Ventilation work completed
- Pipe boot and penetration details
- Chimney or wall flashing details
- Material batches or types installed
- Extra labor or materials needed
- Customer or manager approval for scope changes
- Weather interruptions
- Time work paused or resumed
Capture proof at each stage, not just once
A roofing project changes fast. A missing photo of exposed decking can become a problem later if the customer challenges a repair charge. A missing note about a weather stop can create confusion about why the crew left early.
A simple habit works well. Require the crew lead to capture proof at these moments:
- On arrival
- After setup and protection
- After tear-off or inspection opening
- After repairs to substrate or flashing
- After underlayment and waterproofing steps
- During main material installation
- After cleanup
- At final walkaround
That stage-based approach makes records much easier to review later.
Using AI to make field proof easier
Some contractors now describe this kind of process as an ai site visit workflow because the goal is not just storage. It is fast capture, organized records, and easier review. In practice, the value still comes from disciplined field habits. Technology helps only if your checklist is clear and your crew follows it every time.
If you run multiple crews across several jobs each day, a digital board can help supervisors see job status, missing proof, and next actions in one place. TaskSiddhi’s boards and views are useful for that kind of field coordination.
Before each job: the full roofing site visit proof checklist
This checklist is the simplest version to hand to a crew lead. It is short enough for daily use.
1. Confirm job identity
Make sure the record includes:
- Job number
- Property address
- Customer name
- Scheduled scope
- Crew lead
- Arrival date and time
2. Record site conditions
Capture:
- Weather
- Access conditions
- Safety issues
- Vehicles or obstacles in the work zone
- Material delivery status
3. Take pre-work photos
Take wide and close shots of:
- Roof areas
- Gutters
- Siding
- Landscaping
- Entry points
- Existing damage
4. Note customer communication
Write down:
- What the customer reported
- Any visible leak location
- Any restrictions or special requests
- Permission details if needed for interior checks
During each job: the full roofing site visit proof checklist
The middle of the job is where money is won or lost. Scope changes and quality proof belong here.
1. Log the work stages
For each stage, note:
- Start time
- Work completed
- Who performed it
- Delays or interruptions
2. Photograph hidden conditions
When layers are removed, capture:
- Decking damage
- Moisture issues
- Rot
- Flashing issues
- Vent issues
- Penetration details
3. Record change orders or approvals
If additional work is needed, log:
- What was found
- Why the original scope changed
- Who approved it
- When it was approved
4. Track materials and labor exceptions
Add notes on:
- Extra material used
- Special order items
- Return trips needed
- Additional labor hours
For contractors who want stronger oversight, time tracking and reporting can help connect field activity to labor and job review.
After each job: the full roofing site visit proof checklist
After the installation or repair is complete, your proof should show not only the finished roof but also the final condition of the site.
1. Take completion photos
Photograph:
- Each roof plane completed
- Ridge, valleys, and edges
- Flashing details
- Penetrations
- Gutters
- Cleanup around the property
- Dump trailer or debris pickup if relevant
2. Record completion details
Add:
- Time work finished
- Final crew count
- Materials left on site, if any
- Punch items still open
- Warranty-related notes
- Follow-up needed
3. Confirm cleanup and customer handoff
Document:
- Magnet sweep or nail check completed
- Tarps removed
- Driveway and walkways cleared
- Final customer walkthrough, if done
- Customer comments or sign-off
4. Save proof in one job record
This step is often missed. All photos, notes, times, and approvals should live in one place. If the office has to search phones, texts, and email later, your proof process is still broken.
For roofing businesses that manage inspections, repairs, and install crews, a shared workflow built around field visits and service jobs can reduce that scramble.
How detailed should your checklist be?
It should be detailed enough to prevent disputes but short enough that crews actually use it. Most roofing teams need one core checklist with a few job-type variations for inspections, repairs, replacements, and emergency calls.
A checklist that is too long gets ignored. A checklist that is too vague creates bad records. The right balance is a short required list plus optional notes for special cases.
Keep the required fields small
Your must-have items should include:
- Address
- Arrival and finish time
- Crew lead
- Pre-job photos
- In-progress photos
- Completion photos
- Change notes
- Final status
That is the minimum. Everything else can be added based on your job type.
Create separate add-ons for different roofing work
For example:
- Inspection jobs need more observation notes
- Leak calls need interior moisture notes
- Insurance-related jobs need more damage photos
- Full replacements need stage-by-stage install proof
- Commercial jobs may need site access and safety notes
This keeps the process usable without sacrificing quality.
How do you standardize proof across multiple crews?
Use one checklist, one photo order, and one place to store every record. Train crew leads on the exact minimum proof required before a job can be marked complete.
Standardization is what turns documentation into a management tool. Without it, each crew records jobs differently and your office cannot compare quality or completeness.
Build one standard operating process
Start with a simple policy:
- No job starts without pre-job proof.
- No change in scope is billed without notes and photos.
- No job is closed without completion proof.
- No records stay only on a personal phone.
This process should be trained in ride-alongs and reinforced in weekly crew meetings.
Review proof quickly, not weeks later
The best time to catch missing records is the same day. If supervisors review proof by the afternoon, crews can still fix gaps while details are fresh.
A shared workflow with automation can help flag missing steps or incomplete records before a job is treated as done.
Common mistakes roofing contractors make with site visit proof
Most proof problems come from inconsistency, not bad intent. The crew is busy. The office is busy. The job closes without enough evidence.
Here are the most common mistakes:
Taking only close-up photos
Close shots show details. They do not show context. Always take wide photos first.
Skipping pre-existing damage
If dents, cracks, or weak decking existed before work, document them early. Do not rely on memory.
Failing to log approvals
A verbal approval on a phone call is easy to dispute later. Write down who approved what and when.
Leaving proof scattered
If some records are in text messages, some in notebooks, and some in the camera roll, they are not really job records.
Marking jobs complete too early
Do not close the job until cleanup, final photos, and any customer handoff are recorded.
A simple workflow for a 5 to 30 person roofing team
Small and midsize roofing companies need a process that works without a full back-office admin team. The easiest model is to make the crew lead responsible for capture and the office responsible for review.
Daily workflow example
- Office creates the job card with address, scope, and schedule.
- Crew lead opens the job on arrival.
- Crew lead completes pre-job checklist and photos.
- During the job, stage photos and notes are added.
- Any added work is documented before billing.
- Final photos and cleanup proof are uploaded.
- Office reviews and closes the job or requests missing proof.
That approach works especially well for teams still moving away from paper and chat-based updates. If you want a system built around roofing and other field operations, TaskSiddhi’s features support structured job tracking for crews doing recurring site work and client-facing jobs.
Frequently asked questions
What is the minimum site visit proof checklist for roofing contractors?
At minimum, capture the address, arrival time, crew lead, pre-job photos, progress photos, completion photos, and notes on any added work. That basic record is enough to support billing and handle many common disputes.
Should roofing contractors collect customer signatures after every job?
Not always, but it can help on larger jobs, disputed jobs, or commercial work. Even when you do not collect a signature, you should still log final status, completion time, and any customer comments.
How many photos should a roofing crew take per site visit?
There is no fixed number, but the record should show condition before, during, and after the job. For most roofing work, wide and close photos at each major stage are more useful than a large pile of random images.
Can a site visit proof checklist help with insurance-related roofing jobs?
Yes. Clear photos, timestamps, and notes about visible damage or hidden conditions can support conversations with adjusters and property owners. It also helps your office explain line items and change in scope.
Is paper good enough for roofing site visit proof?
Paper can work for very small teams, but it often breaks when you run multiple crews and job types. Photos, timestamps, and notes are easier to review and store when they are tied to one digital job record.
If you want to see a practical way to organize roofing job proof, crew updates, and field records, take the product tour or compare options on the pricing page.